| PPC Installation |
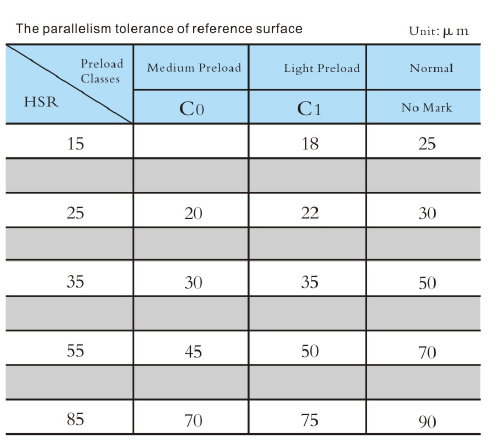
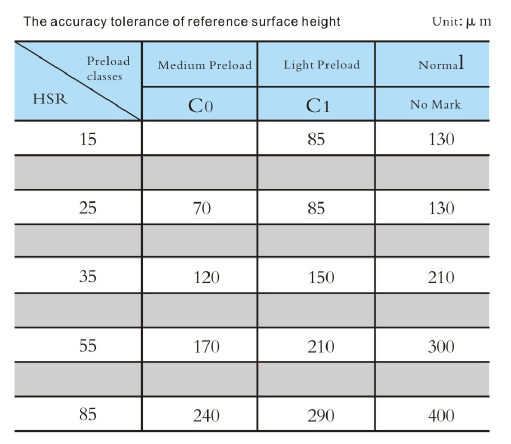
one、The parallelism between the two PPC rails allows for errors.  |
 |
 |
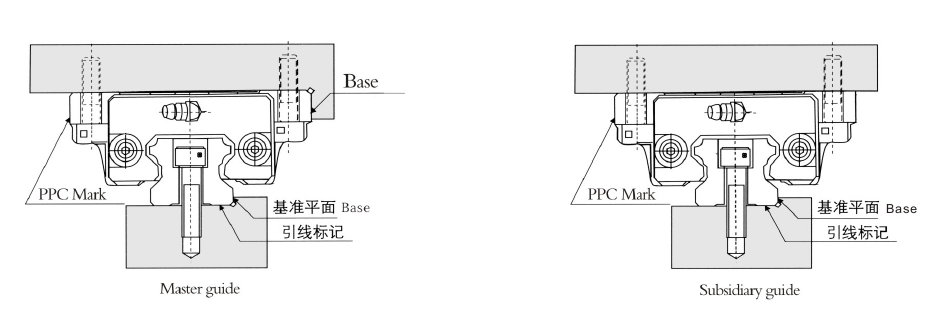
two、Base of PPC linear guide assembly
The guide strip is marked with the lead side as the reference plane, and the opposite side of the slider is marked with the opposite side of the PPC mark (relative to the reference rail face).
Both the rails and sliders of the reference rails have a “J” mark.
|
three、PPC linear guide and sliders of various transverse pressure method
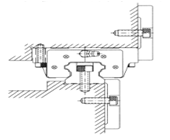
(This method is widely used)

(screw diameter is limited) |
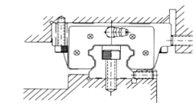
(Proper control of screw torque)

(Screw length ≥ diameter X2)
|
four、Installation prepare of PPC linear guide
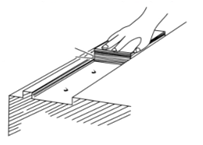
Be sure to remove burr, dent and dust from the mounting surface of the machine to which the linear guide is to be mounted before installing the linear guide |
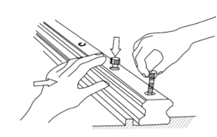
Checking with the bolt for an allowance |
Fives、Mechanical withstand vibration impact, and requires high rigidity, high precision installation method Two side linear guide assembly Two side linear guide assembly
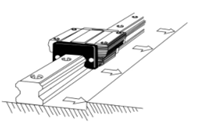 1.Aligning the LM Rail with the Reference-surface 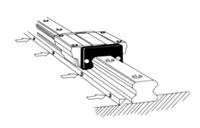 2.Secure the set screws for the PPC rail in order with a tightening force just enough to have the rail closely contact the side mounting surface. 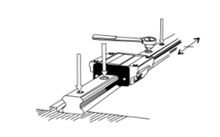 3.tighten the linear guide bolts
Slider assembly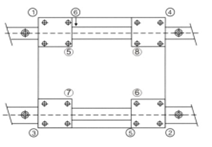
Slider bolts into the non-formal tightening, tighten the transverse pressure slider bolts. After that, formal tightening the slider bolts. |
six、Installation of linear guide screws without transverse pressure

|
Mounting the Master Rail
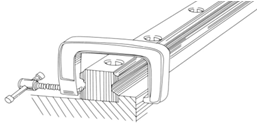 |
After temporarily fastening the mounting bolts,firmly press PPC rail to the side reference
surface at the position of each mounting boltusing a small vice and fully fasten the
bolt.Perform this in order from either rail end to the other. |
Mounting the Subsidiary Rail
To mount the subsidiary rail in parallel with the master rail, which has been correctly
installed,we recommend adopting the methods below.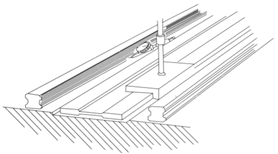 |
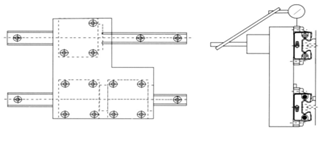
1.Using a Straight-edge
Place straight-edges between the two rails, and arrange the straight-edges in parallel with
the side reference surface of the master rail using a dial gauge. Then, secure the
mounting bolts in order while achieving straightness of the subsidiary rail with the
straight edge as the reference by using the dia lgauge. |
 |
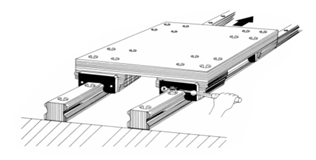
2.Using Parallelism of the Table
Secure the two PPC blocks on the master linear rail with the table (or a temporary table
for measurement ), and temporarily fasten the rail and the block on the subsidiary rail
with the table. Place a dial gauge to the side face of the block on the subsidiary rail from
the dial stand fi xed on the table top, then fasten the bolts in order while achieving
parallelism of the subsidiary rail by moving the table from the rail end. |
 |
3.the Subsidiary Rail Follow the Master Rail
Place the table on the blocks of the correctly mounted master rail and the temporarily
fastened subsidiary rail, and fully fasten the two blocks on the master rail and one of the
two blocks on the subsidiary rail with bolts.Fully tighten the mounting bolts on the
subsidiary rail in order while temporarily fastening the remaining block on the subsidiary
rail. |
Seven、Mounting the linear guide when the master rail does not have a reference
surface |
| Mounting the Master Rail
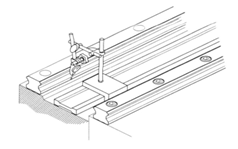 |
1.Using a Temporary Reference Surface
You can temporarily set a reference surface
near the rail mounting position on the base to
achieve straightness of the rail from the rail
end. In this method, two blocks must be joined
together and attached to a measurement plate,
as shown. |
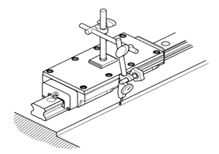
The mounting method of the driven side rail is the same as that of the slave side rail with no cross-pressure fastening screws. |
2.Using a Straight-edge
After temporarily fastening the mounting bolts,use a dial gauge to check the straightness of the side reference surface of the rail from the rail end, and at the same time, fully fasten the mounting bolts. |